

That empty space above your kitchen cabinets? Designers see it as a hidden styling opportunity. Done right, it can make your kitchen feel taller, warmer, and thoughtfully finished. Done wrong, it can feel cluttered or forgotten. The good news is you don’t need a big budget or a full remodel to get it right—just a few smart styling rules and a clear plan.
Start With a Clear Purpose (Not Just Filling Space)
Before adding anything, pause and decide why you’re decorating above the cabinets. Designers never decorate just to fill a gap.
Ask yourself:
- Do you want the kitchen to feel cozier?
- More elevated and polished?
- Slightly rustic or relaxed?
Once you know the goal, choices become easier.
Designer tip:
If your cabinets already go nearly to the ceiling, minimal styling works best. If there’s a larger gap, intentional décor helps balance proportions.
Avoid:
- Random items with no shared color or style
- Small pieces that look lost up high
Think of this space as a visual frame, not a storage shelf.
Choose a Simple Color Story
A clean color palette is what separates “designer” styling from clutter.
Stick to:
- 2–3 main colors
- 1 supporting texture (wood, ceramic, metal, or woven)
Popular, easy combinations:
- White + warm wood + greenery
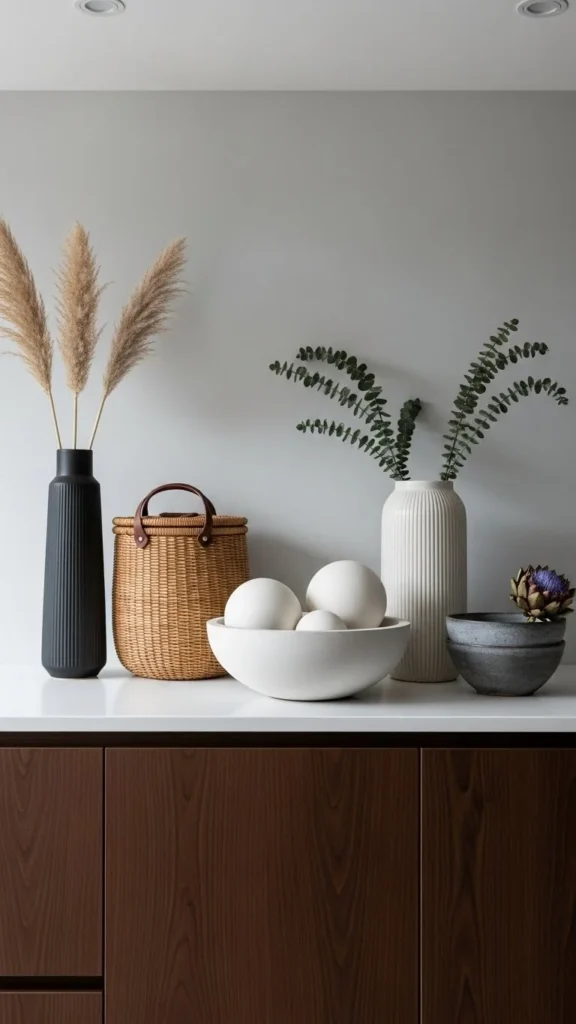
- Neutral ceramics + black accents
- Soft earth tones + natural textures
Keeping colors consistent helps the eye travel smoothly across the top of the cabinets without distraction.
Use Height and Scale to Your Advantage
This is one of the most common mistakes: décor that’s too small.
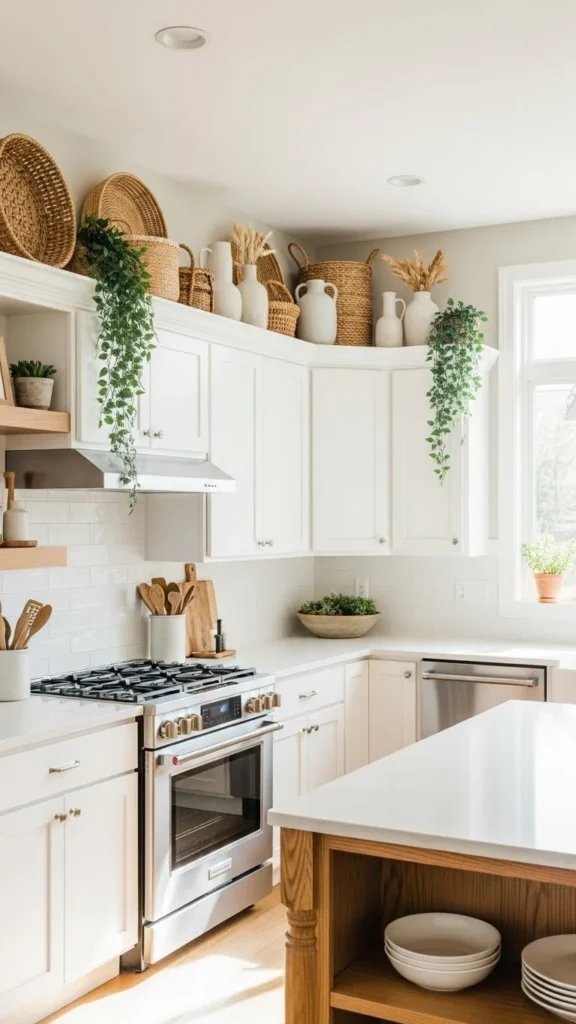
Above-cabinet styling works best with:
- Tall vases
- Large baskets
- Oversized pitchers
- Stacked objects with vertical height
Designer trick:
Group items in odd numbers (3 or 5) and vary heights within each group.
For example:
- One tall vase
- One medium object
- One low, grounding piece
This creates visual rhythm instead of a flat line of objects.
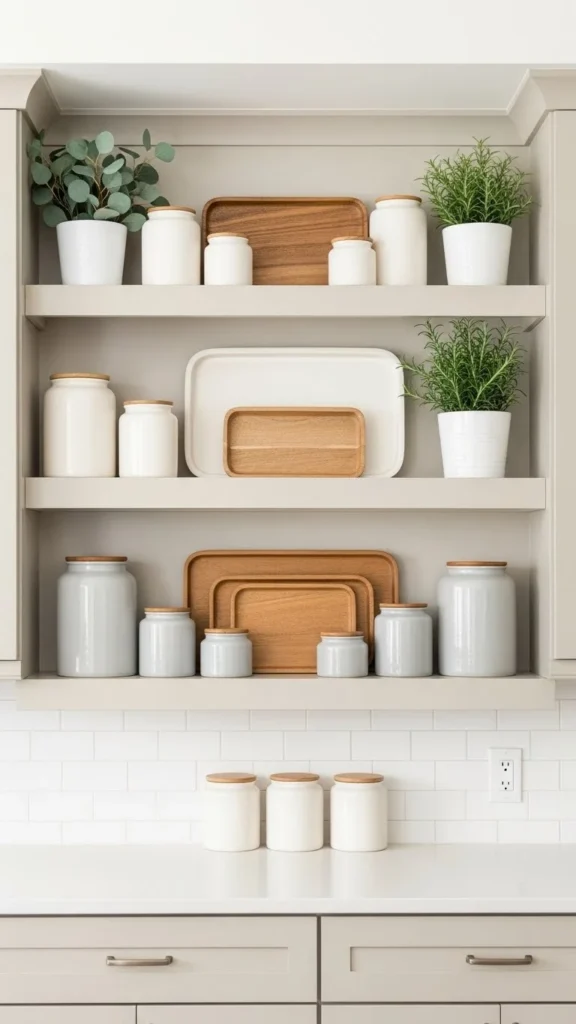
Add Texture for Warmth and Depth
Since this space is often far from reach, texture matters more than function.
Great texture options include:
- Woven baskets
- Stoneware or matte ceramics
- Aged wood cutting boards
- Subtle metal accents (brushed, not shiny)
Mixing textures keeps neutral kitchens from feeling cold and adds interest without extra color.
Quick check:
If everything is glossy or smooth, it will feel flat from a distance. Add at least one textured piece per grouping.
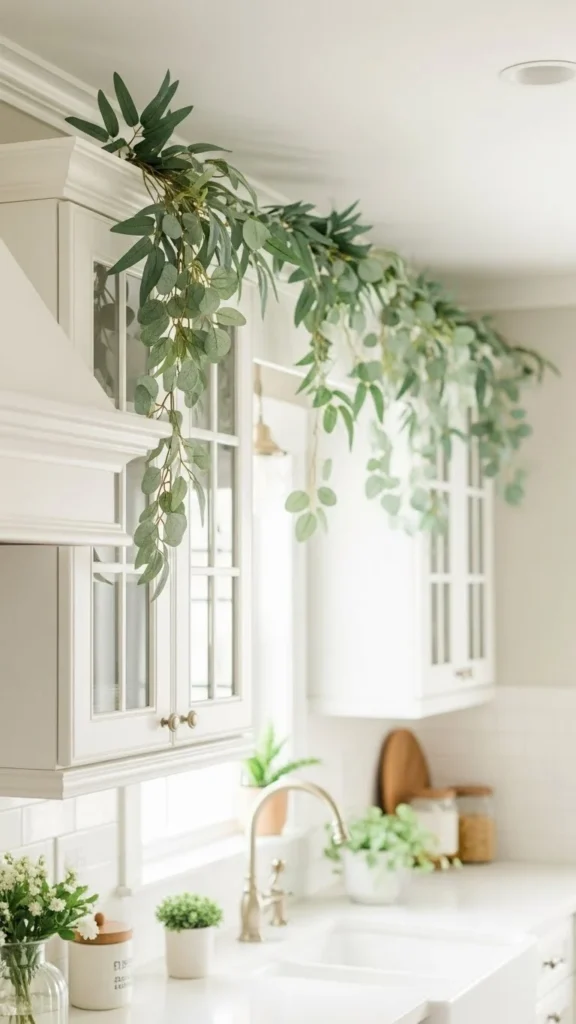
Use Greenery (But Keep It Effortless)
Greenery softens hard cabinet lines and adds life to the kitchen.
Best options:
- Faux trailing plants
- Olive branches
- Eucalyptus stems
- Dried botanicals
Tips to keep it designer-approved:
- Choose realistic faux plants (matte leaves, varied tones)
- Let greenery drape slightly instead of standing straight up
- Avoid overcrowding—less feels more intentional
Repeat Shapes to Create Flow
Designers love repetition because it creates cohesion.
Try repeating:
- The same vase shape in different sizes
- Matching baskets across multiple cabinet sections
- Similar materials in different forms
For example:
- Three matching jars spaced across the cabinets
- Identical baskets above separate cabinet runs
This subtle repetition makes the whole kitchen feel planned, not pieced together.
Know When to Leave Space Empty
One of the most designer-like choices is not filling every inch.
Empty space:
- Gives the eye a place to rest
- Makes decorated areas stand out more
- Keeps the kitchen feeling airy
If your kitchen already has:
- Bold backsplash
- Statement lighting
- Busy countertops
Then minimal styling above cabinets often looks best.
Quick Styling Checklist
Before you step back and admire your work, check:
- ✔ Items are large enough to be seen from below
- ✔ Colors repeat elsewhere in the kitchen
- ✔ Heights vary within each grouping
- ✔ There’s breathing room between objects
Final Takeaway
Decorating above kitchen cabinets like a designer isn’t about buying trendy pieces—it’s about intention, scale, and restraint. Choose a clear style, keep your color palette tight, and let texture and height do the work. When in doubt, simplify. A few well-chosen pieces will always look better than a crowded shelf.
Save this guide for later and revisit it the next time your kitchen feels almost finished—but not quite.

Leave a Reply